


Clean room carts need a defined cleaning and return route before they enter the next material-transfer cycle. Cleaning only the upper shelf leaves handles, tray runners, wheels and the route back to storage unresolved. A useful procedure treats the cart as an asset with a known location, use history and release status.
This workflow focuses on what happens after unloading. It helps teams separate a cart awaiting cleaning from one ready for issue, prevent used packaging from returning with clean supplies and keep the cleaning method compatible with the complete assembly.
Choose a Return Strategy for Each Cart Route
Start by deciding whether the cart stays in one zone, passes through a controlled cleaning point or hands its load to a separate cart at a boundary. These arrangements require different space and staffing. A cart that travels through an uncontrolled corridor should not return directly to a clean staging position merely because its shelves look empty.
| Return strategy | Operating arrangement | Key control |
|---|---|---|
| Zone-dedicated cart | The cart remains within its assigned area | Clear identification and a defined cleaning location within that area |
| Cart cleaned at a boundary | The cart moves through a designated preparation point | Separation between incoming used carts and released carts |
| Load transfer between carts | Separate carts serve the two sides of a boundary | Controlled handling of the load and its packaging during transfer |
Map the empty-cart journey as well as the loaded journey. A well-planned delivery route can still fail when the empty cart is parked beside waste, mixed with returns or pushed through an incompatible area on its way back.
Identify the Cart and Its Status
Assign each cart an identity that remains legible through the cleaning process. Link it to its approved area and configuration. Use a clear status system for awaiting cleaning, under maintenance and ready for use. The status should be visible without putting paperwork on a cleaned load surface.
Provide separate parking positions for the different states. A label alone is weak control when used and released carts are interlocked in the same storage bay. Keep the release point close enough to the cleaning area that a cart does not have to cross an uncontrolled path immediately after cleaning.
Unload and Remove Waste Before Detailed Cleaning
Remove remaining materials, packaging and labels that are not part of the cart's permanent identification. Check shelf corners, beneath trays and behind retaining components. Keep returned materials separate from waste so staff do not need to search through discarded packaging for a missing item.
Park the empty cart securely before removing trays or other removable parts. Follow the equipment instructions for supports and restraints. Do not tip a cart or reach beneath it in a way that creates an unstable load or pinch hazard. Damaged wheels, loose shelves and broken restraints belong in the maintenance route before the cart is released.
Match the Cleaning Method to the Cart Construction
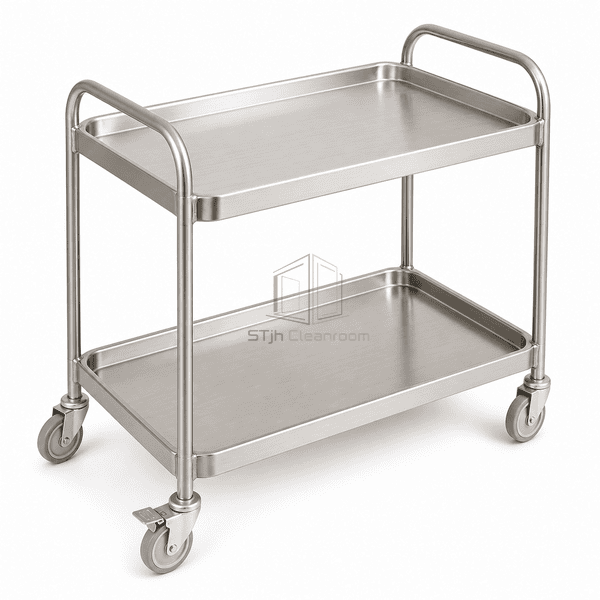
A wipe-down trolley and a washdown trolley require different construction details. Open shelves expose large surfaces for wiping, while folded shelf edges, tubular-frame joints and caster housings determine where liquid can remain. Before choosing a wet cleaning method, identify openings, drainage paths and components protected from water. Stainless steel shelves alone do not make the complete cart suitable for immersion or pressure washing.
| Construction detail | Cleaning advantage | Point to resolve |
|---|---|---|
| Solid raised-edge shelf | Supports small packages and keeps loose items on the shelf | Liquid can collect at the rim; include corners and the underside of the folded edge in cleaning and drying |
| Perforated shelf | Provides openings for air movement and drainage | Both faces and hole edges need access; liquid passing through can contaminate a lower shelf already cleaned |
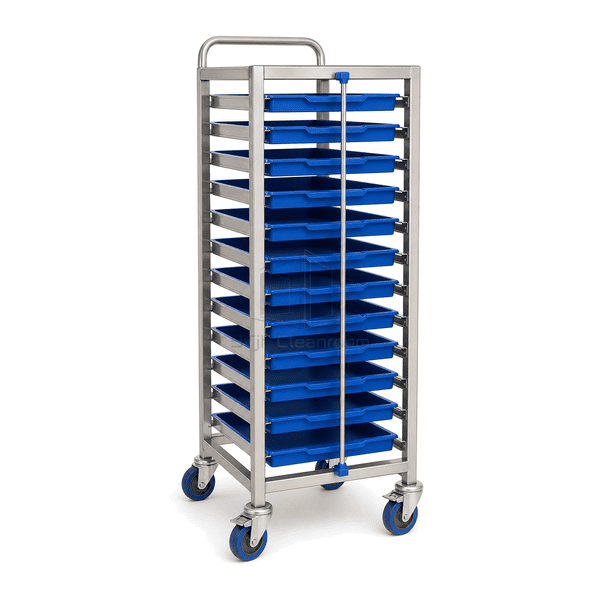
| Removable trays | Separates tray cleaning from cleaning the supporting frame | Provide a clean drying surface and inspect tray lips, runner contact areas and restraints before refitting |
| Welded frame intersections | A smooth, continuous joint avoids a loose connection at that location | Inspect the actual joint for cracks, crevices or retained residue; a welded label does not describe every joint's finish |
| Wheel and swivel assembly | Allows the cart to follow the material route | Wheel tread, fork, swivel bearing and brake need separate access and material-compatible treatment |
Choose the cart around the intended cleaning process before ordering it. For an existing cart, identify the tray material, wheel compound, bearing protection and permitted cleaning method from its component information. Repeatedly soaking an unsuitable caster is not corrected by choosing a more corrosion-resistant shelf.
Write a Surface-by-Surface Cleaning Sequence
List the load surfaces, handles, frame joints, undersides, tray supports and caster assemblies. Define which components are removed for cleaning and where they are placed. Use the approved cleaning product, application method and drying process for each material.
Stainless shelves, polymer trays, seals, wheels and bearings do not necessarily tolerate the same chemistry or water exposure. Confirm compatibility for the whole assembly. Avoid directing cleaning liquid into bearings or other components that are not designed for that treatment.
| Area | Commonly missed point | Inspection after cleaning |
|---|---|---|
| Shelves and trays | Raised edges, corners and lower faces | No retained residue; surfaces dry as required |
| Handles and frame | Hand-contact areas and intersecting members | Clean contact surfaces and intact finish |
| Tray supports | Runner channels, stops and retaining bar | Debris removed and components refitted correctly |
| Casters and wheels | Wheel tread, fork recesses and brake areas | No trapped debris; safe movement and brake operation |
Control the sequence so cleaning a lower, dirtier part does not recontaminate a finished shelf. Change cleaning materials as needed. Do not put cleaned removable trays onto an unprepared floor or workbench while finishing the frame.
Keep Cleaning, Disinfection and Drying in the Right Order
Cleaning removes dirt and residue. Where the process also calls for disinfection, select the disinfectant for the surface and intended use, remove soil as required, then follow its dilution and contact-time instructions. Do not wipe the product dry immediately when its label requires the surface to remain wet.
The EPA's surface-disinfectant guidance explains the importance of surface suitability, pre-cleaning and maintaining the stated wet contact time. This is guidance on disinfectant use, not a cleanroom-cart acceptance specification. After the required contact stage, follow the specified rinse and drying instructions for that process and material.
Set trays on a prepared support with both faces accessible. Do not stack damp trays tightly together: contact areas can retain liquid even when the upper tray looks dry. Finish the wheel assemblies separately from load-contact surfaces, and change cleaning materials before returning to shelves or handles. Move the cart only along the cleaned return route after release.
Handle Tray Carts as Several Related Components
zhengfeng's cleanroom tray cart uses removable trays, dedicated runners, rear stops and a retaining bar. Include these parts in the cleaning and refitting checklist. The removable trays make their lower faces accessible, but the exposed frame still needs attention.
After cleaning, check that each tray seats correctly and that the restraint is restored. Keep replacement trays matched to the approved support geometry. A tray that sits unevenly or does not engage the intended retention system should not be released with the cart.
Distinguish a Cleaning Defect from a Repair Defect
A cart that looks clean can still damage its load or contaminate the route through worn parts. Inspect the empty assembly before restoring its ready status. The observations below lead to different actions; repeated wiping is not a repair for a damaged surface or a binding wheel.
| Finding | Likely inspection point | Required disposition |
|---|---|---|
| Residue reappears beneath a tray | Runner contact faces, underside of the tray lip and the drying support | Separate the parts, clean the hidden surfaces and correct the drying/reassembly sequence |
| Staining or pitting remains after cleaning | Surface damage and the cleaning chemical, dilution, exposure and rinse history | Have the damaged component assessed for repair or replacement; do not scrape it aggressively to restore appearance |
| A tray rocks or fails to reach its rear stop | Tray distortion, lodged debris, runner damage and replacement-tray geometry | Correct the interference or replace the matched component; confirm seating and restraint engagement |
| A wheel catches or the cart pulls to one side | Trapped fibers, tread damage, loose caster fixing and swivel movement | Remove debris or service the defective assembly, then test steering before loading |
| The brake lever moves but the cart rolls | Wheel/brake engagement and the specified brake function | Remove the cart from use until the brake holds as intended; a moving lever is not proof of braking |
Replace casters by mounting pattern, wheel diameter, construction, load rating and braking function together. A similar-looking wheel can change cart height, tracking or brake access. Record the accepted replacement so the next maintenance cycle does not start from visual guesswork.
Release the Cart Against Defined Checks
Inspect the cleaned cart in suitable lighting. Check for residue, retained liquid, damaged surfaces and loose parts. Test steering and brakes where applicable, and confirm that trays, shelves and restraints are correctly fitted. Follow any additional cleanliness checks required by the material-handling process.
Document the cart identity, cleaning completion, inspection result and release status. A visible-clean check is useful, but it should not be described as a particle, microbial or other performance result that was not measured. Keep the inspection claim limited to the check actually performed.
Prevent Recontamination in Ready Storage
Store released carts in their assigned position, away from used packaging and maintenance work. Keep the parking bay itself within the cleaning programme. Prevent personnel from using an empty ready cart as a temporary bench or waste carrier.
Define what happens when a released cart is moved outside its assigned route or remains unused under conditions that affect its status. The site procedure should provide the reinspection or recleaning decision. That is more reliable than assuming an old release label remains valid indefinitely.
Specify Carts That Fit the Cleaning Workflow
The zhengfeng material trolley provides an open shelf arrangement suitable for assessing direct wiping access. The carts and material-handling range also supports comparison with tray-based formats. Choose the format around both the material-transfer task and the cleaning route.
Send zhengfeng your cart route and cleaning method, including the cleaning agents, removable parts, parking arrangement and required replacement components. This gives the quotation a clear operational basis and helps avoid selecting a configuration that is difficult to maintain in your facility.
Frequently Asked Questions
Can the same cart carry incoming supplies and outgoing waste?
Separate those duties wherever the process requires it. Any shared use needs an explicit changeover and cleaning procedure, not an informal wipe between trips.
Should wheels be included in the cleaning plan?
Yes. Include the wheel and caster assembly using a method compatible with its materials and construction.
Can a cart be released while its trays are still wet?
Follow the defined drying and release requirements for the process. Do not reassemble or load the cart in a way that traps cleaning liquid.